Saturation is one of those tools that can completely transform a sound with just a few small adjustments. A bass that feels too empty can gain body, a lead can become more present, and a melody can sound much richer and more alive.
However, it is also one of the easiest tools to overdo. When we use too much saturation, we can end up creating excessive distortion, unpleasant frequencies and a build-up of energy that makes balancing the mix considerably harder.
I use saturation quite frequently in my productions, especially on prominent elements such as basses and lead synths. For me, it is an essential tool, but that does not mean we should use it on every channel.
What matters is understanding what it actually contributes and, above all, when it is worth using.
What is saturation in music production?
Saturation is a type of nonlinear processing that changes the waveform of an audio signal and generates additional harmonic content.
Originally, this phenomenon was associated with the behaviour of analogue equipment, such as tape machines, valves and certain electronic circuits, when driven with sufficiently strong signals.
In digital production, we use plugins that recreate different types of saturation or allow us to create new forms of distortion in a controlled way.
But what does adding harmonics actually mean?
Imagine a sound with a fundamental frequency of 100 Hz. Depending on the type of saturation we use, we can generate additional components at frequencies such as 200 Hz, 300 Hz, 400 Hz and other multiples of that fundamental.
These harmonics change the sound's timbre and can make us perceive it as richer, brighter, warmer or more present.
Of course, not every type of saturation generates the same harmonics or produces the same result. Some are gentler and more musical, while others create much more aggressive distortion.
This brings us to one of the key ideas in this article: saturation is not simply about making something louder, but about changing its sonic character.
When should you use saturation?
My recommendation is very similar to the advice I usually give when discussing compression: before inserting a plugin, be clear about what you want to achieve.
Does the bass need more presence? Does a synth sound too clean or empty? Do you want a melody to stand out more without increasing its volume too much?
In situations like these, saturation can be a very useful tool.
Personally, I mainly apply it to the prominent sounds in my productions. In genres such as Trance, Progressive House and Melodic Techno, basses and leads play a fundamental role, and the right saturation can help give them the character we are looking for.
However, many modern synths and samples already include internal processing. Some sounds are compressed, EQ'd and saturated at the source.
That is why adding another saturation stage is not always an improvement.
If the sound already works perfectly within the mix, we probably do not need to change it.
Saturation on bass: more body, harmonics and presence
If there is one element I use saturation on almost every time, it is the bass.
In my productions, the bass plays a fundamental role. It must not only provide energy in the low frequencies, but also have enough presence to be heard and distinguished properly within the mix.
Sometimes, when working with certain synths, we can get a bass with powerful sub frequencies but little harmonic information in the midrange.
The result can be a deep sound that feels too empty or is difficult to hear on small playback systems.
This is where saturation can make a big difference.
By generating additional harmonics, we can give the bass more character and make it easier to hear without relying exclusively on turning it up.
This is particularly useful because small speakers, such as those in some mobile phones, cannot reproduce sub-bass frequencies properly. They can, however, reproduce some of the upper harmonics generated by saturation.
A well-saturated bass can therefore retain a stronger sense of presence across different listening systems.
How I use saturation on my basses
One of my favourite plugins for this job is FabFilter Saturn 2.
I particularly like it because it lets me work with different types of saturation and split the processing into several frequency bands.
This is very useful when we want to add harmonics and presence without changing the lowest frequencies too much.
For example, we can keep the sub-bass region relatively clean and apply more noticeable saturation to the bass's midrange.
It is not necessary to work this way every time, but it is a useful option when we want to preserve a solid, controlled low end.
After applying saturation, I usually review the sound's balance, adjust its level and use EQ where necessary.
The combination of saturation, volume and EQ can produce excellent results, but we need to remember that these processes are connected.
When we add harmonics, we also change the sound's frequency content. We may therefore need to correct certain frequencies to make the bass fit properly with the other elements.
My advice is not to chase a bass that sounds spectacular in isolation. Aim for a bass that works within the mix, especially alongside the kick.
Saturation on leads and melodies: creating richer sounds
Leads are another element I frequently use saturation on.
In Trance and Progressive, melodies often take centre stage. We want them to have energy, emotion and enough presence to stand out among the bass, percussion and atmospheric elements.
Sometimes, we have a great melody, but the synth sound feels too clean, thin or uninteresting.
Moderate saturation can enrich its harmonic content and give it more body and presence.
Personally, I like using it to add a little more brightness and character to certain leads, especially when I want them to sound bigger and fuller.
But there is something important to understand: saturation does not always add warmth.
Depending on the algorithm, it can generate harmonics we perceive as warm and smooth or, conversely, create a much brighter and more aggressive sound.
Choosing the right type of saturation is therefore essential.
If the lead already has a lot of high-frequency energy, adding more harmonics can make it sound harsh or tiring.
In these cases, less is usually more.
It is also worth listening to how saturation interacts with other effects. If the synth already has plenty of reverb and delay, excessive saturation can make the whole sound too dense and reduce its definition.
Remember that we want to enrich the sound, not destroy the space it occupies in the mix.
Which saturation plugins do I use?
There are now countless tools available for saturation, from very simple plugins to extremely comprehensive multiband processors.
These are some of the ones I find most interesting.
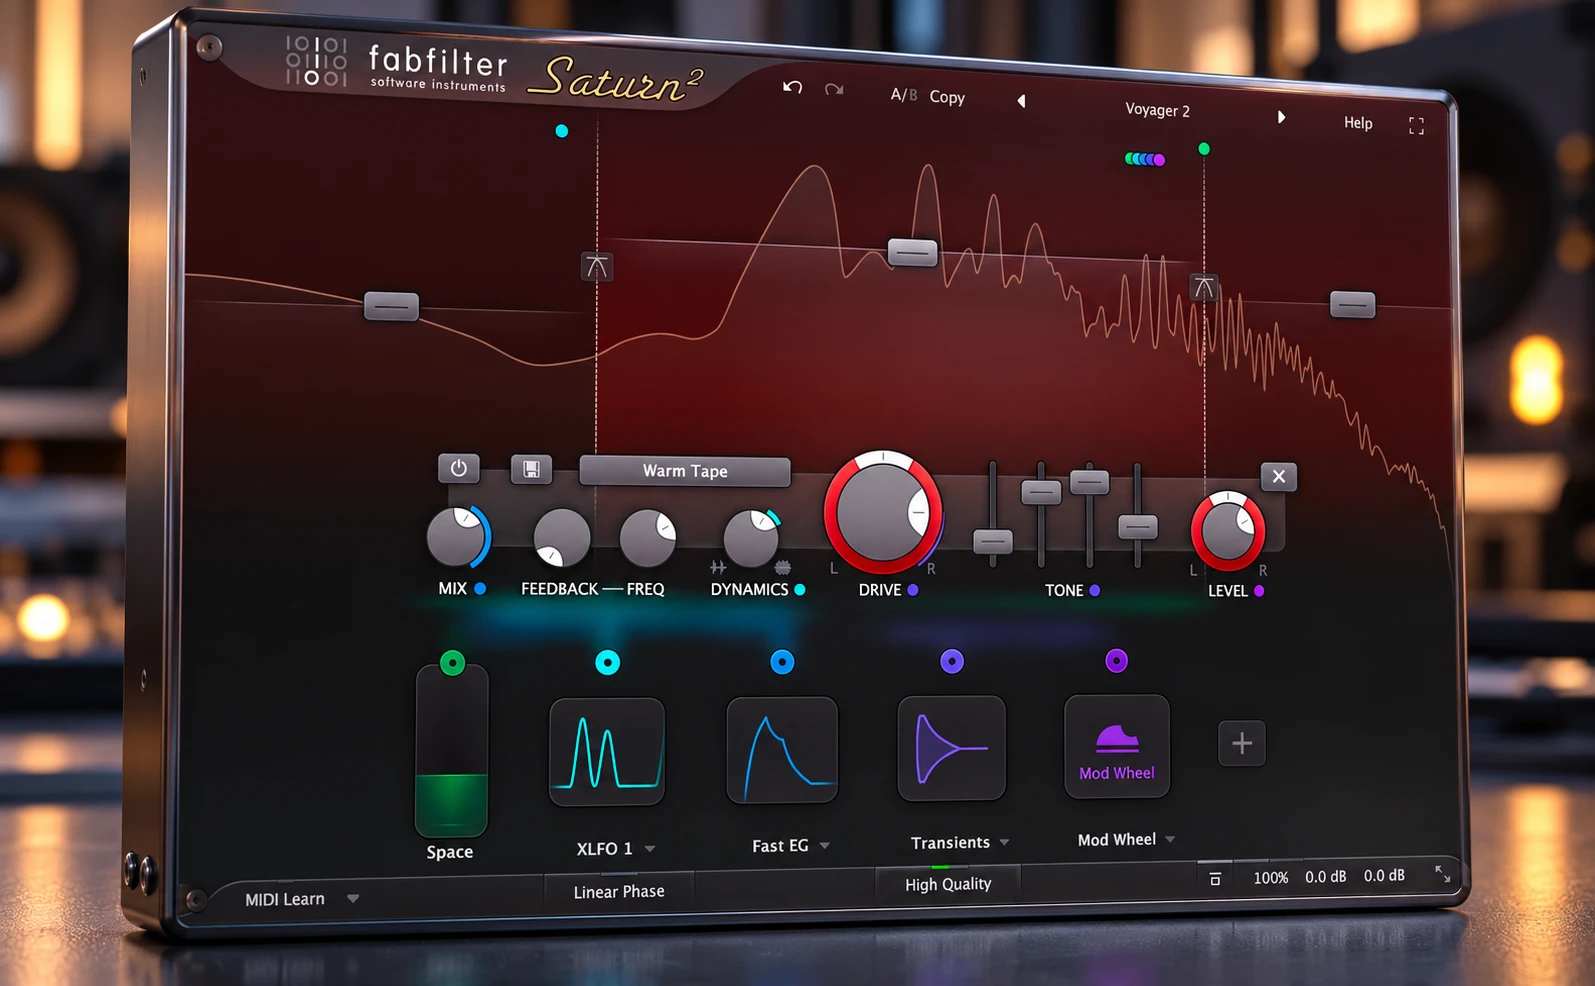
FabFilter Saturn 2
It is one of my favourites because of its versatility.
Saturn 2 offers different saturation and distortion models, including valve, tape and amplifier emulations, as well as more creative algorithms.
Its multiband processing lets you apply different amounts and types of saturation to different parts of the spectrum.
For example, you can use gentle saturation on the low frequencies and different processing in the mids.
It also includes dynamics, tone and mix controls, allowing you to fine-tune the result.
For me, it is particularly useful when I want to shape the character of a bass or enrich a synth without losing too much control over its balance.
Soundgoodizer in FL Studio
If you have used FL Studio, you probably know Soundgoodizer.
It is one of those plugins that can make a sound seem instantly more powerful and present with a single control.
But what does it actually do?
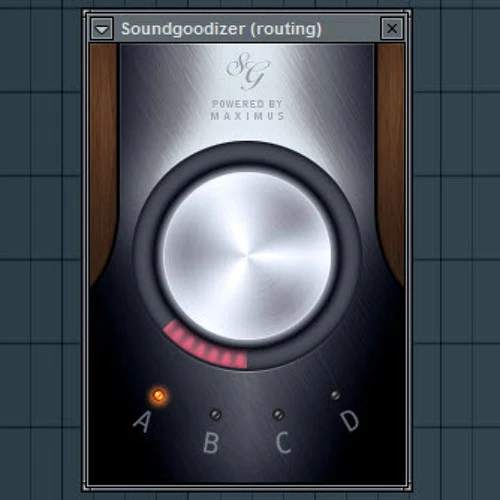
Soundgoodizer is based on the processing engine of Maximus, FL Studio's multiband processor.
It uses four predefined configurations, labelled A, B, C and D, and lets you control the intensity of the processing with a single knob.
It combines multiband dynamics processing and sonic coloration, so it can increase a signal's density and change its character.
It is not simply a conventional saturation plugin, although it can produce some of the results we want when adding body and presence.
Personally, I have used it a lot while working in FL Studio, particularly because of how quickly it can produce interesting results.
There is one thing to watch out for, though: it is very easy to confuse an increase in volume with a genuine improvement in the sound.
My recommendation is to use it in moderation and always check the result within the mix.
Saturation in Ableton Live 12
Ableton Live also has excellent tools for working with saturation.
One of the most interesting is Roar, a saturation and coloration processor that lets you combine different distortion stages, filters and processing configurations.
It is a very versatile tool, capable of producing anything from subtle saturation to extremely aggressive sounds.
There is also Saturator, a more direct option for adding harmonic distortion, alongside devices such as Dynamic Tube and Pedal, which offer different types of coloration.
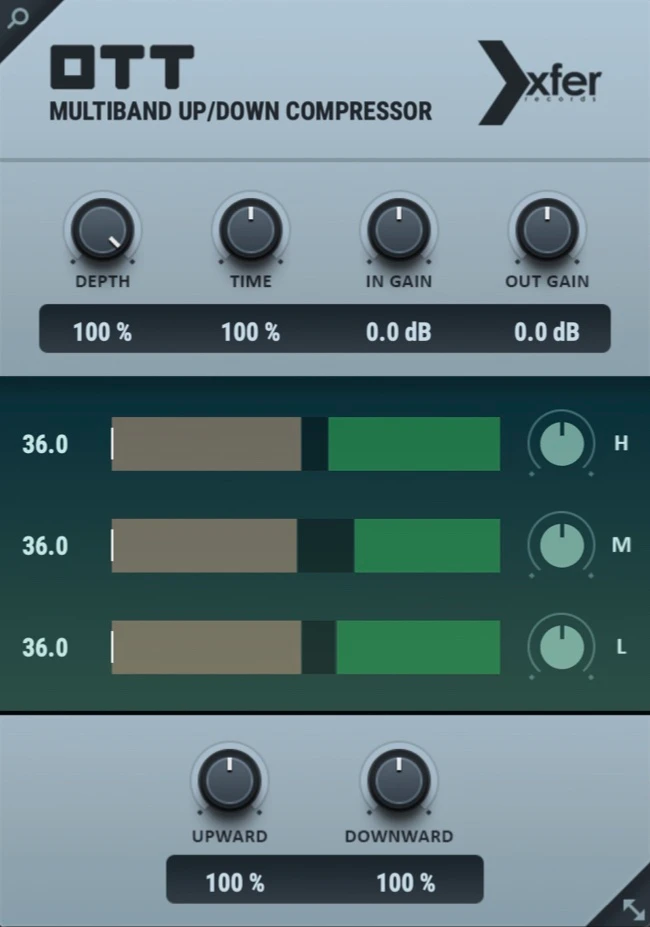
Here, I also want to mention a tool many producers know: OTT.
Xfer Records' well-known free OTT plugin is inspired by the OTT preset in Ableton Live's Multiband Dynamics device.
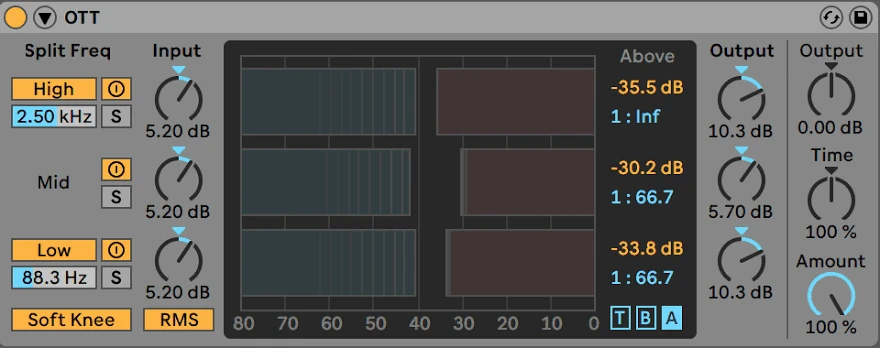
Although it can produce denser, brighter and more aggressive sounds, we should be clear that OTT is not a conventional saturator. It works primarily through upward and downward multiband compression.
So, while we can use it to achieve certain kinds of presence and density, we should not confuse it with a processor dedicated to generating harmonic saturation.
The danger of using too much saturation
So far, we have discussed the benefits of saturation, but we also need to understand its drawbacks.
One of the most common mistakes is to keep increasing the amount because, at first, the sound seems to improve.
We add a little and the bass becomes more present. We add more and it seems even more powerful. We keep going and suddenly have a much more aggressive sound that is difficult to control and takes up too much space in the mix.
The problem is that we do not always notice immediately.
As we increase saturation, we can generate a large number of additional harmonics, especially in the mid and high frequencies.
If we do this to several elements at once, we can end up accumulating too much energy in certain parts of the spectrum.
The result can be a harsh, tiring mix with little separation between instruments.
Depending on the processing, we can also change the dynamics and create peaks that make a suitable balance harder to maintain.
Watch out for noise in Saturn 2
There is a detail I have personally noticed when using FabFilter Saturn 2: with certain settings, we can end up introducing quite noticeable noise into the sound.
Some of Saturn 2's saturation styles include a small amount of noise as part of their processing, something FabFilter has also confirmed.
This noise can become more obvious with certain settings, or when we subsequently apply EQ, compression or further distortion stages.
That is why I always pay attention to how the sound behaves when using Saturn 2, especially in the high frequencies.
If components resembling white noise or excessive harshness appear, it is worth reviewing the selected style and the amount of saturation.
We should not confuse harmonic richness with a build-up of unwanted noise or distortion.
Five tips for using saturation more effectively
After so many years producing electronic music, there are a few recommendations I find particularly useful.
1. Use saturation with a clear purpose. Before inserting the plugin, think about what the sound needs. More body? More presence? A different character? If you cannot identify a specific improvement, you probably do not need to saturate it.
2. Control the level before and after processing. Many plugins increase a sound's perceived level. Try comparing the processed signal with the original at a similar volume. Otherwise, you may think it sounds better simply because it is louder.
3. Do not be afraid to use the Mix control. We do not always need the fully saturated sound. Blending some of the original signal with the processed signal can help produce a more natural result and better preserve its character.
4. Review the EQ after saturation. Adding harmonics changes the sound's frequency content. Check whether any frequencies need controlling and adjust the EQ when necessary.
5. Always listen within the mix. A lead or bass can sound spectacular on its own and still cause problems when the other instruments come in. Saturation should help us create a more balanced mix, not just more impressive individual sounds.
One final technical point: intense digital saturation can also introduce aliasing artifacts, particularly at high frequencies. If your plugin offers oversampling or high-quality options, they are worth trying to reduce these artifacts, bearing in mind that they can increase CPU usage.
Do you need saturation on every sound?
No. I think this is one of the most important conclusions.
I use saturation very frequently in my productions, especially on basses and leads, but that does not mean every element needs this processing.
A percussion sample may already have enough character. An atmospheric effect may work perfectly without saturation. A synth may include internal distortion and need no additional stage.
We can even encounter situations where saturation makes the result worse.
When producing electronic music, especially genres that combine many synths, powerful basses and percussion, we need to be careful about a build-up of processing.
If we saturate every element, we risk losing the contrast between them.
That contrast is precisely what allows certain sounds to stand out.
Sometimes, leaving one element cleaner is the best way to give another more presence.
Conclusion: more harmonics do not always mean better sound
Saturation is a fundamental tool in my music production process.
I use it especially to enrich basses and leads, add harmonics and give certain elements more body, warmth or presence within the mix.
Plugins such as FabFilter Saturn 2, Soundgoodizer and Ableton Live's saturation tools can produce excellent results, but none of them automatically guarantees a better sound.
What really matters is learning to listen to what each element needs.
Good saturation can transform a sound that is too clean or empty into something far more interesting. But too much saturation can destroy its balance and create problems we then have to try to fix with other processors.
My advice is simple: use saturation to improve the sound, not just because you have a plugin available.
The best saturation is not the most obvious, but the one that gives your mix exactly what it needs.